
A detailed step by step
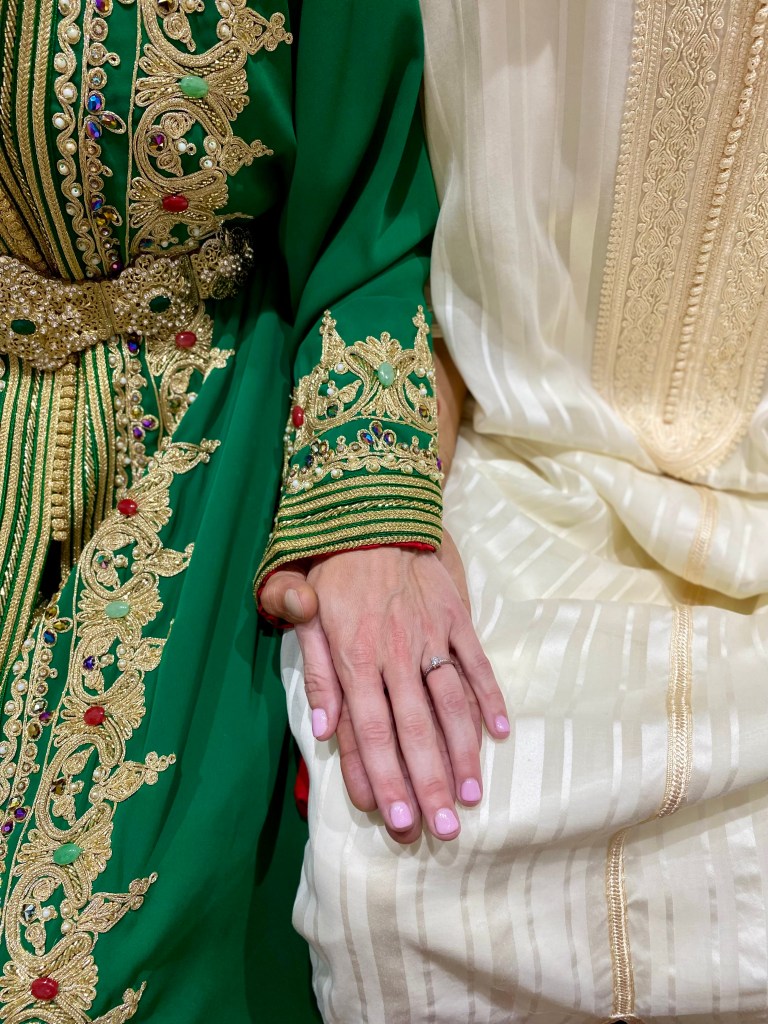
The marriage process as an American who is marrying a Moroccan (in Morocco) is overwhelming. I gathered my papers and had everything done in a month-so I will share my process as it happened in 2025. Your steps will be the same but you might have a different time frame which allows you to do it at your leisure, on a budget. As always, this guide is based on my experience. Regulations can change so always do some research to make sure the same steps are required.
Our whole process (with the court approval) took 3 months with about a month break included. Our rush didn’t exist anymore due to family being in the country so we slowed down.
Step 0: Make your consulate appointment in Casablanca. On the US consulate website you will schedule an appointment for notarial and other services. When I went to make this appointment the earliest appointment was 2 months out which was perfect for me. https://evisaforms.state.gov/Instructions/ACSSchedulingSystem.asp
My process went like this. Proposal June 25th. Scheduled the embassy appointment on June 27th for August 12th.
USA trip July 2-August 5th.
Step 1 and 2 can be done in either order but you want to do this ASAP if you are in the states for a short time.
USA
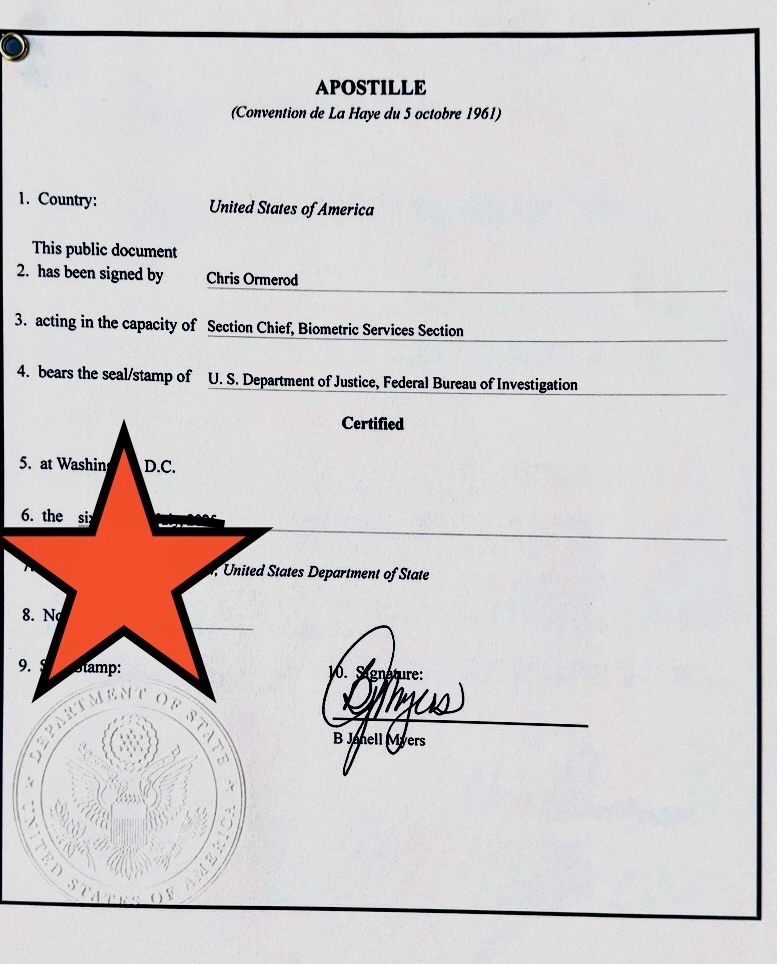
Step 1: You need your original birth certificate from the vital records office in your state. For me it was the regional health district. I did a walk in, paid $40 and left with my birth certificate-if you have your original already, you can use it. This next part is VITAL-you need an apostille from the Secretary of State which will be obtained at your state capital. Depending on your time frame you can send your original birth certificate by mail to your Secretary of State, with the fee and get it back in the mail. I was in a time crunch as I didn’t know I needed the apostille for my birth certificate until 4 days prior to heading back to Morocco (don’t let the certified stamp on your birth certificate trick you). My only option was to do it in person so I drove 5 hours to the Secretary of State, got there at opening, paid $115 for the rush fee (same day service) and was on my happy way with my apostille (paper attached to my original birth certificate).
The regular fee to apostille one document is $15 in Washington state.
The apostille is a paper and it will be attached to your birth certificate, do not separate them.
Step 2: You need an FBI Rap Sheet. I have done this from Morocco VIA mail-sending a physical fingerprint card and getting the results back in the mail in the past. If you have the time this is the cheapest and slowest route. There are a few ways to do this-the USPS does finger printing in house (research for the location as not all post offices do it). You apply online and pay an $18 fee before going to the post office for an electric scan. (You will get a QR code or number to take to the post office with you, if you are not doing the post office route, you don’t need to pay the $18). This is the route I meant to go but I scheduled an appointment through Sterling (certified Live Scan, $65) after finding a local UPS store that offered this service. I scheduled my UPS visit on their website and then paid the fee on Sterling. UPS did my virtual scan and got the electronic results sent to my E-mail the same day. I then needed to send this to Washington DC to get an apostille. Again, the apostille is vital.
The printed version is considered the *original*. If you have time you can send it in the mail, or take it yourself if you are in Washington DC. I did not have the time to do this so I paid a company, Monument Visa Service LLC ($155 for the rush apostille service and 2-3 day shipping back). What they do is print your original and take it to the US department of state (Washington DC) for a walk-in service-what you can do yourself if you are in the area. Again, the apostille page will be attached to your FBI check, do not separate them.
FBI website for information: https://www.fbi.gov/how-we-can-help-you/more-fbi-services-and-information/identity-history-summary-checks/identity-history-summary-checks-faqs
Step 3: Once you have these documents, find a sworn translator in Morocco who can begin the translation for your documents before you arrive in Morocco.(If you are doing this in Tangier I can give you the one I used, she was a GEM.) I sent my birth certificate/apostille, FBI check/apostille pages via email to the translator and she began translating. I sent it before arriving in Morocco to cut down on the amount of time it would take to get them back once I arrived back in Morocco.
Step 4: Religious document-if you are a female you need a document declaring that you are Christian, Muslim or Jewish. A baptism paper works if you have one. I happened to have my original documentation so I did not have to get it…If you do need to-the establishment that did it should have the record.
If you are a male, you need to convert to Muslim. You can do this at any mosque where you will get a document. If you bring this document from the states, it also needs to be translated.
Step 4.5: I did this from the states but I had to be connected on a VPN (Morocco) to access the site. Request your Moroccan background check. I requested it and had it sent to my Moroccan address for 25dh. I requested it and it was processed and mailed out the same day and I got it 2 days later. Your partner will also need to do this step. (I did something wrong here, these papers did not end up getting used…and I never did clarify what the issue was. However, in our city in when submitting the paper to the family courts they let us know it was wrong and they ordered the correct one from the same place and got it in 2 days…I wasn’t there for this part but my husband picked up the correct papers that were delivered and added them to our file which was held at the court office.)
https://casierjudiciaire.justice.gov.ma/Accueil.aspx?culture=en-US
Morocco
USA documents are complete! Congratulations. When you get to Morocco you will give the translator the originals so they can finalize the translations or start if you did not send them beforehand like I did. You will have one more paper to translate-the one you get from the embassy, so you will make another trip to the translator.
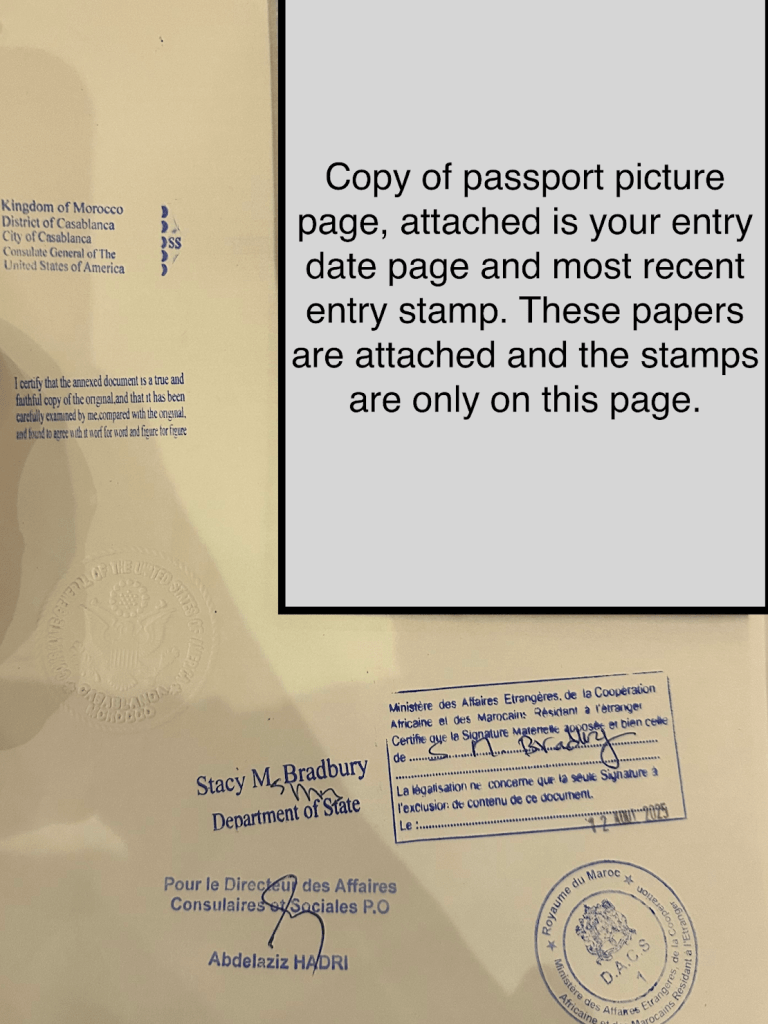
Step 5. Make copies of your passport. You need your photo page, your Morocco entry number page (typically the last page) and your most recent entry stamp page. 1 copy for you to keep and 1 to take to your consulate appointment. I made color copies.
Step 6. Hopefully you have a morning appointment for this. I took the train to Casablanca and arrived at the consulate at 9:30 for my 9:45 appointment. You attend this appointment by yourself. They checked my copies on the outside and I didn’t know I needed my most recent entry stamp copy so I had to run across the street and copy that page (5dh). With your three copies (picture page, entry number, most recent entry stamp) and your appointment confirmation page you will get in. You will be in a waiting area, watch who walks in before you as you will be after them. There isn’t a system here. You just walk up when it is your turn.
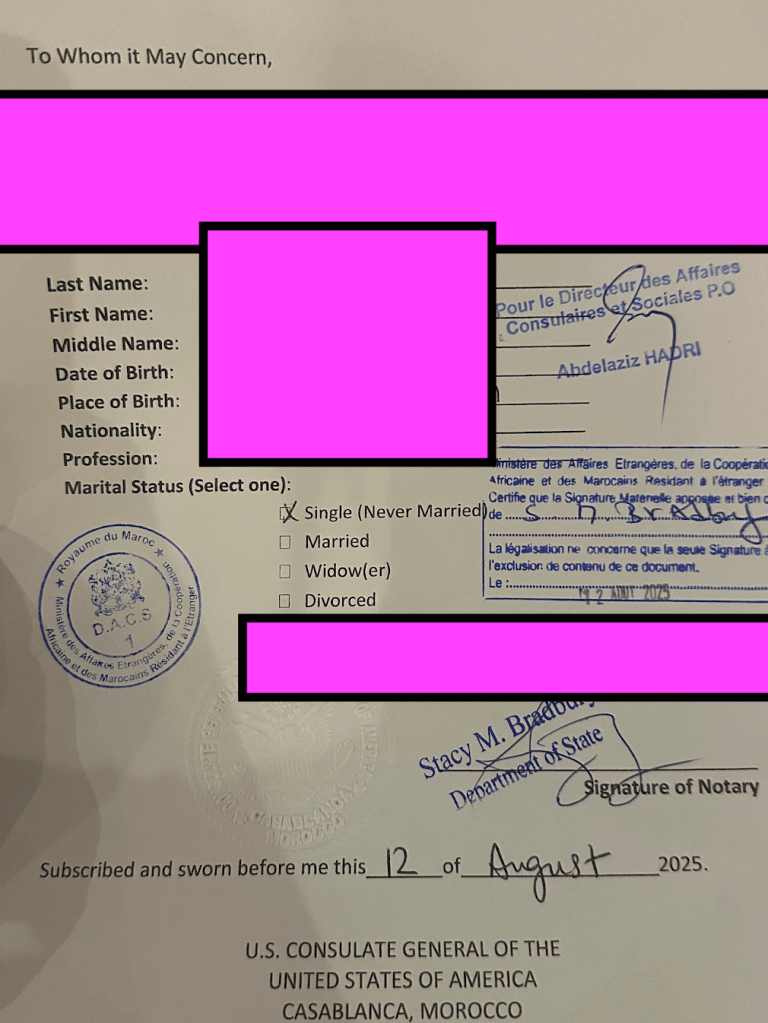
You will hand your copies and passport over and they will give you an affidavit of eligibility to marry in Morocco. You will fill this out, go pay the $100 fee for the notary on your affidavit and the passport copy. After you pay you wait to be called up where you will raise your right hand and swear that you are eligible to marry under Moroccan laws and then you will be off with your papers!
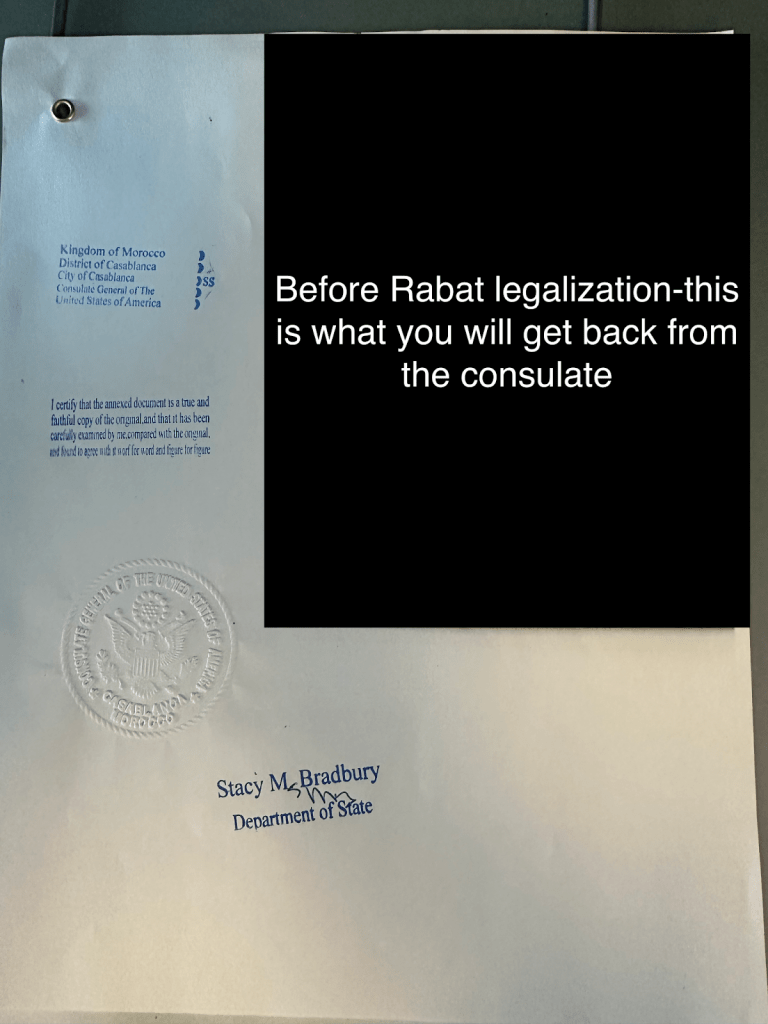
Step 7. Take these papers to Rabat to be stamped. It was the easiest for me to do this on my way back home-I recommend doing it in one day. I got off the train and grabbed a taxi. You will go to the Ministry of Foreign Affairs (legalization) located at 5 Rue Tamsloht. You will find several addresses online but this is the correct location. This is another appointment you must go to solo. You will be directed up stairs, get one stamp, change to another office across the hall for the next stamp. You visit two people here, make sure you get both stamps on your affidavit and passport page. You will have 4 stamps on your affidavit and 6 on your passport copy. From what I have heard the affidavit is the most important paper in this process. The legalization process does not have a fee. MAYBE-if you get your Moroccan background check stamped here or picked up the original it would be usable?
Step 8: The consulate papers are the last papers you need to hand off to the translator. I took these the day after we got back and received all of my translated documents on the same day. The timeline on this may depend on your translator. The cost for all of my translations was 800dh. My translated documents include: FBI background check/apostille, birth certificate/apostille, affidavit, *religious document if you brought it from the US.
Step 9: Moroccan medical check-go to a doctor and let them know it is for marriage. You will get a medical certificate in French or Arabic and the doctor will put your information on this and stamp it. Easiest part of the process!
Step 10: I wanted to be extra prepared so I asked my work for a work certificate for my proof of employment. For females this is not necessary, males it is.
Step 11: Copy your residence card and get your passport pictures taken-you will use 4-6 of these in your file.
In my file I have:
1. Consulate documents (legalized affidavit/translation + passport copies)
2. FBI background check + Apostille + translation
3. Religious document
4. Birth certificate + Apostille + Translation
5. Moroccan background check •Ours was not correct…ask your Adoul which one to order…•
6. Moroccan medical check
7. Work certificate
8. Copy of residence card
9. Passport photos
Step 12: Make 2 complete copies of all of your documents. You will have 2 copy sets plus your original set.
If you have an Adoul you will hand these papers off to them and they will handle it from here. I recommend doing this. We submitted them ourselves and it took my love 4-5 trips to the family court (for his paperwork). I cannot comment on this part as I was not present for all of it. If you choose to do it yourself you should both go-it was unusual for him to be there alone.
Once your file is submitted to family court you need the reference number for your file. We picked this up from an office in the Family Courts Division a few days after submitting everything. We got a sealed manila folder that included our file and the reference number. We went directly to the main police station for our police interview. We handed the file over and waited to be called back.
Step 13: Police interview
The officer started by asking my love a few questions about us (when we met and started dating, where I am from…). Then he asked my him and I both for a DETAILED report of our education and work background, starting from kindergarten until present.
Step 15: Pick up your papers! After the interview (Friday) he told us to come back Tuesday which is when we picked a paper up to deliver back to the family court. The paper was delivered to family court on Tuesday and we went back Friday. Friday we had to arrive before 11 pm. I wasn’t sure what we were waiting for or what we were getting.
To my happy surprise, when we sat down the woman gave us the stamped papers with the permission to marry! The judge approved and signed up on everything this morning and we left with two papers. They keep everything that you submit.
We took these papers straight to the Adula and the process was COMPLETE.
Your fiance needs to be diligent about their paperwork as well. My file was in order and the only hiccup was the Moroccan background check.
Step 14: Happy living and good luck!
illies


Leave a reply to Teanna White Cancel reply